Showing posts with label integration. Show all posts

Sunday, February 12, 2017

Using related entities in PowerApps with MSDYN365 as a data source

Getting related records to work in PowerApps and MSDYN365

PowerApps is a relatively new feature to the Office365 portfolio which allows advanced users to create their own apps which can be used on mobile (and desktop) platforms to perform daily tasks. It is a great tool for creating those small functions you usually have to book a developer for a few hours/days, and is ready for authentication, authorization, and distribution right out of the box.
PowerApps comes with the ability to connect to a wide array of sources to collect and manipulate data, and today I'm going to demonstrate how to connect with MSDYN365:CRM and how to use connect with related records.

Connecting to MSDYN365:CRM

Now this is the easiest part. To connect with MSDYN365 in your powerapp simply go to the 'Content' tab and select Data Sources, and you'll be presented with the option to add new connections and data sources. Here it will probably show you something like this (I have a completely new trial organization with only O365 E3 and MSDYN365 Plan1:

What I'm doing is connecting to the MSDYN365 suggestion, and I'm going to add 3 tables (entities) to my data source list; Accounts, Contacts and Users (systemusers).
Once that's done I'm going to add a new screen with the browse template. This will give me the option to search and display records from the chosen data source.
Now, from the right hand side, choose the advanced tab and select your Gallery component from the dropdown list. Next through the Home tab on the top toolbar select "Items" from the property dropdown box. We're going to do some drastic changes to the formula used to collect data, but first a little insight.

When a function is run/validated in powerapps it returns the result set to the parent function (or context, whatever you'd like to call it). This means that we can build an advanced data source or query by nesting functions inside each other, and end up with a pretty good set of data to play with.

So to get the data I want in my gallery browser I'm going to use the following formula:
SortByColumns(Search(AddColumns(Accounts, "User", LookUp(Users, systemuserid = _ownerid_value), "Contact", LookUp(Contacts, contactid = _primarycontactid_value)), TextSearchBox1.Text, "accountnumber", "name"), "name", If(SortDescending1, Descending, Ascending))

Now this might seem a little frightening at first, but I'll go through it step by step and you'll see how I thought through it. Remember the part about nesting functions that I mentioned above? Well that's how I start building a function, by nesting backwards.

  1. I want a collection of accounts, but I also want to add the primary contact and the account owner (I'm not checking for teams, I'm just assuming that all accounts are owned by users. This is just a quick demo). That means I'll have to use a function to join those sources. A quick search online says that I can use AddColumns to do joins in a PowerApp formula, and thanks to the built in intellisense it's easy to create the formula required.
    AddColumns(<data source>, <table alias>, LookUp(<data source>, <condition>))
    This will nest the related table underneath the table alias (or namespace if you will), and you can add additional tables by just specifying new column aliases and lookup expressions. To get the ones I needed I filled in the following:
    AddColumns(Accounts, "User", LookUp(Users, systemuserid = _ownerid_value), "Contact", LookUp(Contacts, contactid = _primarycontactid_value))
    This means that I've nested the Users entity underneath the "User" column alias, and the Contacts entity underneath the "Contact" column alias.
  2. I need to be able to search for these records, I don't simply want all the accounts listed at all times. Search is a function designed for this, but I could also use Filter if it was a set query I wanted to use. Now I know that the AddColumns(...) functon I used will return the result set of that function, so I could potentially search through the related records as well. I'm going to do it a lot simpler so I'll want to search through the account number and name field on account. The syntax is :
    Search(<data source>, <Search text>, <Column to search in>, <Column2 to search in>, ...)
    The data source in our case will be our previous AddColumns formula. The search text we'll get from the default search box, TextSearchBox1.Text, and the columns we want are "accountnumber" and "name", which makes the formula look like this:
    Search(AddColumns(.....), TextSearchBox1.Text, "accountnumber", "name")
  3. Lastly I'd like to sort the result, so I'm going to add a SortByColumns function just to get a predictive list instead of a random one. This starts just the same as our previous function, the result of everything we've done so far has been returned, and we can order by the columns we want. The syntax looks like this:
    SortByColumns(<data source>, <column name>, If(<logical test>, <true value>, <false value>))
    We want to use the data source we've built so far, and we want to use the "name" column of the account. The logical test will be the default sorting button, with true as Descending and false as Ascending (false is the default value). We end up with the following formula:
    SortByColumns(Search(...), "name", If(SortDescending1, Descending, Ascending))
Now we've got a search gallery were we can search for accounts and get the related primary contact and the owning user data values. We can use that to further style our result list so it will look something like this:


Customizing the details form

So now that we have a decent-ish looking gallery we want to do some modifications to our details and edit forms. There isn't really any magic to this, you simply add and remove the data fields that you want. There are however two things I would like to point out so that you don't walk into the sweet honey traps.
First of all, we want to set a data source and item that PowerApps has a relation to and can work with. If we choose the same data source as we used in the gallery then we can certainly we the data and place it on the form, but updating the record or creating a new one could prove a bigger challenge. So what we do here is that for the data source, we set the "Accounts" entity table. The Items property is a bit more special though, and here we have two options (I'm going for option 2):
  1. We use the item from the gallery, ie. BrowseGallery1.Selected. This will work perfectly fine as long as you don't try to update any other fields than the main account fields. However, you will get an error in the PowerApp user interface because the data source chosen for the details form is not the same data source as you have in your gallery. The upside is that you don't have to do a new query to get the account data, but on the downside you will have to live with a warning sign that comes with not following the best practices.
  2. We use the accountid from the gallery to look up the specific account from the account data source, ie we use the following formula:
    LookUp(Accounts, accountid = BrowseGallery1.Selected.accountid)
    The positive thing about this is that we're now 100% compliant with the best practices, but we now don't have direct access to the sub-components, and we're doing an additional query to CRM for a lookup. Luckily, this lookup is very cheap because we're getting 1 entity based on the Guid, and I'll be picking this one just so we can demonstrate how to do a lookup inside a field.
So now that we've got the data available we can start adding the fields to the forms. If we want to have some fields from related records we can simply use the LookUp function to get them. For example, if I want the full name of the primary contact I can use this formula in a data form:
LookUp(Contacts, contactid = _primarycontactid_value).fullname
So now that I've done a very small amount of customization my detail form looks like this.


Customizing the details form and changing the primary contact

So now we're ready to do some customization to the edit form. I've gone ahead and added the same data source and item as we did on the detail form, and I've added the address fields just so we have something to play with. The results so far looks like this:


Now, as a power user I would love to be able to edit the primary contact of the customer without having to specify a Guid, I want a search window so that I can find the right one and add it to the account I'm looking at. The first thing I'll do is to add a new browse gallery screen, and then I add a new button on the edit form which navigates to the new screen:
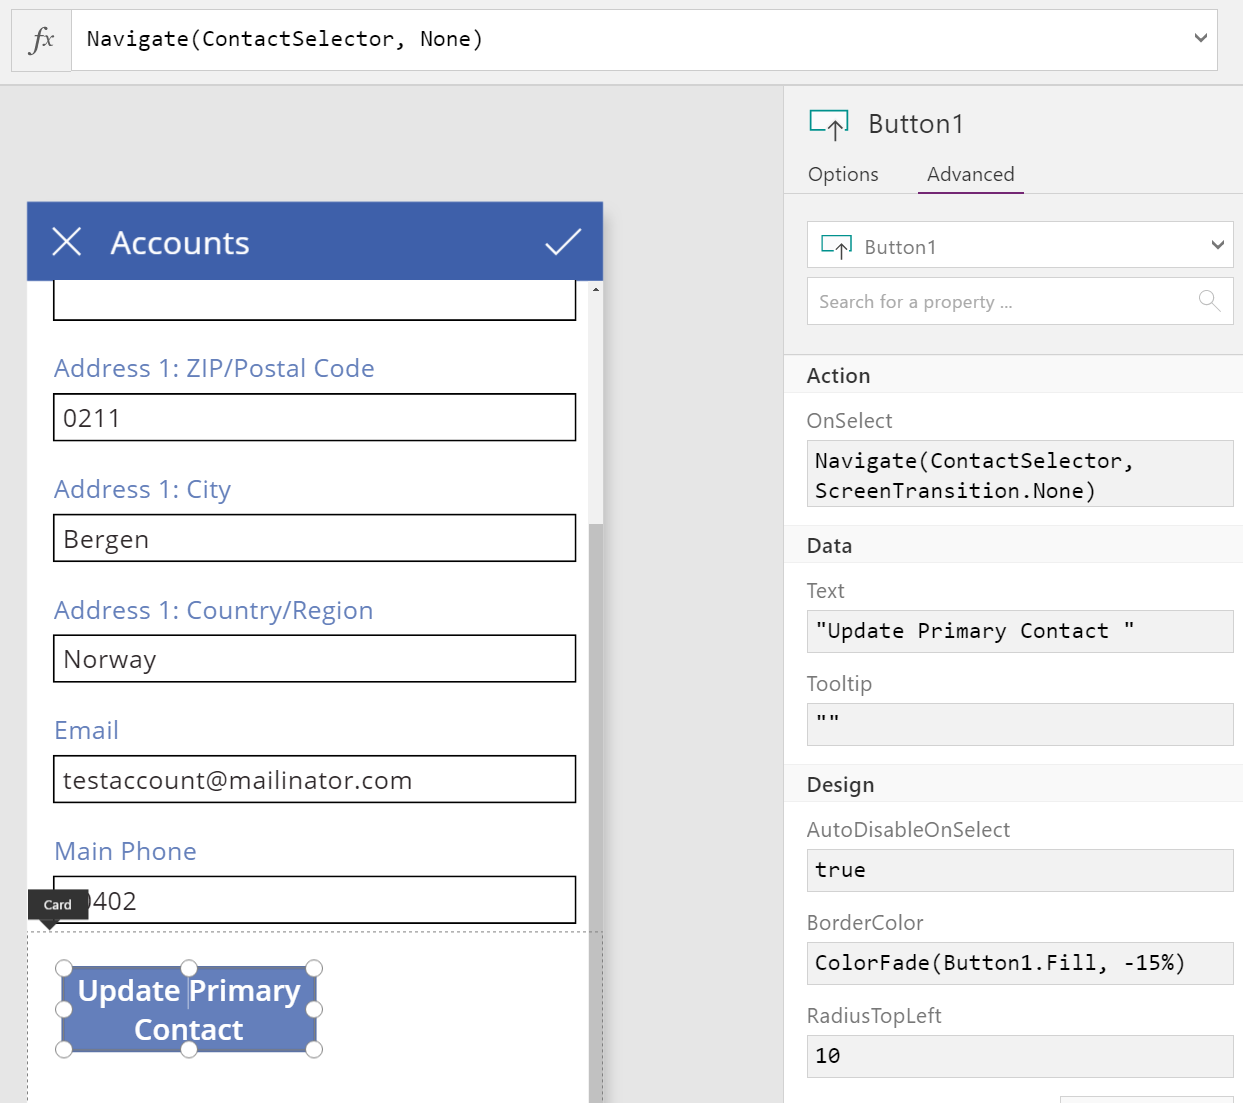
Now, on the contactselector screen I want to show all active contacts. I'll start off by creating the same kind of formula as we did in the beginning of this blog post, but this time I'm just searching through the Contacts data source. My formula now looks like this:
SortByColumns(Search(Filter(Contacts, statecode = 0), TextSearchBox2.Text, "fullname"), "fullname", If(SortDescending1, SortOrder.Descending, SortOrder.Ascending))

Now the right arrow on each result will usually try to navigate to a details window, but we don't have that window here and we don't want to see the details either, we just want to add this contact as the primary contact to the account. So what we're going to do is to use the "patch" function in PowerApps. The Patch option allows you to edit items on an existing record, while the update function replaces an old record with a new one. Since we just want to update the contact I'm going ahead with the patch method. The syntax for the patch function is like this:
Patch(<data source>, LookUp(...), { field1: value1, field2: value2})
So we want to update the account we have selected in previous windows. In additon, we want to update the primary contact Id for that account. That means we have to do a formula like so:
Patch(Accounts, LookUp(Accounts, accountid = BrowseGallery1.Selected.accountid), { _primarycontactid_value: ThisItem.contactid})
This is starting to look pretty nice, but we also want to navigate away from this form after updating. To do that we simply add a semicolon after the Patch function, then call the Back() function to go to the previous window. What we end up with is a window that looks something like this:

So now we have a complete app that can search for Accounts, display related record information, and finally edit the fields and set a new primary contact. This should work just as well for all related records, but now you have a pretty good example to start out with.

Wrap-up

So as we've seen not everything in PowerApps is just point-and-click, but you don't have to be an advanced developer to find out this stuff on your own. The documentation for powerapps is decent, so you'll find plenty of examples you can experiment with on your own.
What I find very exciting is that not only can I create these simple apps very fast, I can also distribute them to other users in my organization so that it will be available from the https://home.dynamics.com menu.

I've added a copy of the powerapp to to my public google drive so you can download it and use it as you want (TestAccounts.msapp). 
All you have to do is to go to the "Content" tab and add the data sources, you'll need "Accounts", "Contacts" and "Users", and then you're ready to go.

Monday, October 31, 2016

Microsoft CRM + Azure Service Bus, part 4 (two-way relaying and using Azure Event Hubs)

Integrating Microsoft Dynamics CRM with Microsoft Azure Service Bus, using queues, topics, relays and the Event Hub

In the previous posts we've looked at using endpoints in CRM, how we can create a simply workflow to push the Activity Context to the Azure Service Bus, using queues and creating a simple one-way listener. In this post we'll focus on extending the code to enable two-way relaying, which will allow us to return data back to CRM. We'll also look at how we can integrate CRM with Azure Event Hubs, a service based on ASB which allows for a lot of throughput.

Allow return value in the CRM Workflow step

The first thing we'll do is to write some more logic for our workflow, to enable us to use a return value. The relay service only returns a string, which means that we could easily push JSON or base64 through the bus to have even more meaningful feedback from the service. Be sure to remember the maximum message size for your service bus, and the timeout values. I do not recommend keeping a connection for a long time to transfer end-to-end data, but there are loads of scenarios where you'd like to get something back.

[Output("Return value")]
public OutArgument<string> ReturnValue { get; set; }
OK, so what we've done here is to add an output variable to our workflow step. This allows us to take the return value and use it inside our workflow in later steps.

protected override void Execute(CodeActivityContext executionContext
{
    var context = executionContext.GetExtension<IWorkflowContext>();
    var serviceEndpointNotifySvc = executionContext
        .GetExtension<
IServiceEndpointNotificationService>();
    
var result = serviceEndpointNotifySvc.Execute(
        ServiceEndpoint.Get(executionContext), context
    );

    ReturnValue.Set(executionContext, result);
}

The code looks mostly the same as it did in part2 of this series, with a couple of additions. Firstly, we assign the return value from the notification service's Execute method to a variable "result". Next we set the value of the new output variable "ReturnValue" to the result, using the execution context of the workflow.
Now just build and deploy the updated workflow, and we'll head into MSCRM. Navigate to the Settings -> Processes area, and open up the workflow created earlier. Deactivate the workflow to enable editing, and then add an update step after the custom workflow step.
I'm going to update the Description field on the Account to the ReturnValue from our custom workflow step.


Finally, go into the plugin registration tool to update the relay service we added in part3. Make sure it's changed to a two-way relay, and eventually update the name and path if you want that. Just make sure to update the same values inside the service.

Writing a two-way relay service

To enable two way communication we first have to change our service behavior class. We have to change the interface it inherits from and add a return value.

[ServiceBehavior]
public class RemoteService : ITwoWayServiceEndpointPlugin
{
    public string Execute(RemoteExecutionContext c)
    {
        Console.WriteLine(
            $"Entity: {c.PrimaryEntityName}, id: {c.PrimaryEntityId}");
        return "Message processed in two-way listener";
    }
}

As you can see we're now inheriting from the ITwoWayServiceEndpointPlugin interface, modified the Execute method to expect a return value, and we added a return statement after printing out to the console. This means that whenever our relay service is triggered it will print out the message as before, but will also return our magic string.

The only other change we have to make is to change the typeof implementation. Earlier we specified IServiceEndpointPlugin, so we have to change it to ITwoWayServiceEndpointPlugin. I've done a little dirty hack, because I've been changing back and forth between relay types while testing, so mine looks like this:
sh
    .AddServiceEndpoint(
        typeof(RemoteService).GetInterfaces().First(), 
        new WS2007HttpRelayBinding(), 
        AppSettings["SBusEndpoint"]
    ).Behaviors.Add(tcEndpointBehavior);
sh.Open();
Console.WriteLine("TwoWay-listener, press ENTER to close");
Console.ReadLine();

sh.Close();

While this may seem like reflection and a good idea, it will only work until you've built yourself a framework to reuse across different projects/customers, and all of a sudden you're implementing several interfaces and everything stops working. For this demo, it's OK, but I'd rather specify the interface type in production code.

Testing two-way relaying

Now that we've got that out of the way, it's time to test our new implementation. Start your new and improved service, and go to CRM and trigger the plugin. If everything goes as planned you'll be looking at the following window for your relay service

 And if we go into CRM and check out the description on our contact entity we'll see the following

So that's all it takes to have two-way communication working in a relay service. We've got CRM on one side, Azure Service Bus as the communication channel, and a simple console project on the other side.

What's a REST listener?

One option I haven't mentioned so far is the REST listener which can be specified in the plugin registration tool. This is simply a two-way relay which uses REST endpoints instead of .Net binaries. This would allow you to create and run a relay service in Node.js, apache tomcat, powershell, IIS, or whichever web server you'd want. Just to trigger all the popular buzwords, this can enable you to use MSCRM, Azure Service Bus, and deploy node.js relay services in docker containers.

Azure Event Hubs

Azure Event Hubs is a special kind of service bus which is designed to handle huge amounts of messages, we're talking millions of messages per second. It's probably not what you're looking at for general integration purposes, but there are several scenarios where it could benefit your company in a big way.
The first thing I thought of was using this for auditing. Just write a simple workflow or plugin which pushes any creates, updates and deletes as messages to the event hub. Then you can use stream analytics or some other technology to populate an auditing system with actions performed by your users and integration systems. Anyone who's used the out-of-the-box auditing functions in MSCRM knows that processing the information is tedious, at best, and more often than not close to impossible to get any useful data from. But if you start pushing it into an external auditing system based on Azure services then you could use clever stuff like temporal tables to design a robust, maintainable system.

The second thing I thought of was predictive analysis. Pushing raw data to the event hub, which allows for transfer to an Azure Data Warehouse for real-time data crunching and you have a great additional source of data that can be used for predictive analysis or (buzzword warning) machine learning.

There are probably a lot of cool things you can do with this, but I won't elaborate all my ideas in this blog post. What I want to stress is the price tag. It is incredibly cheap compared to legacy systems based on clusters of servers running different messages queues with some expensive bus technology on top. And the performance is great, no matter which size you pick. It doesn't matter if you're running hundres, thousands, or hundreds of millions of messages per day, the performance is always great but there's no entry level cost, the price scales with usage.


That's all for this blog series (at least for now). I might come back to visit later on when I've done some more in-the-field deployments with the ASB.

Sunday, October 30, 2016

Microsoft CRM + Azure Service Bus, part 3 (creating a relay service and endpoint)

Integrating Microsoft Dynamics CRM with Microsoft Azure Service Bus, using queues, topics, relays and the Event Hub

In this, third part of my blog series on using the Azure Service Bus capabilities I'm going to demonstrate how to set up a relay service and add the relay namespace as an endpoint in MSCRM.
Relaying allows us to have active listeners who can either just accept messages or accept and reply to them. This allows for business critical systems like ticket reservation and receipts to ensure we're working on updated and valid data.
Click here for part1
Click here for part2
Click here for part4

What is a relay service?

A relay service works by using the Service Bus like a kind of tunnel, in which the relay is an active listener at the other end. Unlike queues and topics, where the message is "dropped off", using a one-way or two-way (or REST) relay requires that somebody pick up the message immediately. With one-way the sender is happy as long as somebody accepts it, while in a two-way scenario the receiver has to return a value. In this post we'll start out with a one-way relay, but in the next one we'll look at how we can extend that into a two-way relay.

Creating a one-way relay

First off we write a service behavior class. This represents the code we're running whenever a message is received. I'm just going to write out something to the console.

[ServiceBehavior]
public class RemoteService : IServiceEndpointPlugin
{
    public void Execute(RemoteExecutionContext c)
    {
        Console.WriteLine(
            $"Entity: {c.PrimaryEntityName}, id: {c.PrimaryEntityId}");
    }
}

So nothing magical happening here. It's an extension of the IServiceEndpointPlugin, which writes the entity name and id to the console in it's execute method.
Next up we go to the main method and define a servicehost variable and a new endpoint behavior.

var sh = new ServiceHost(typeof(RemoteService));
var tcEndpointBehavior = new TransportClientEndpointBehavior(
    TokenProvider.CreateSharedAccessSignatureTokenProvider(
        AppSettings["SharedAccessKeyName"],
        AppSettings["SharedAccessKey"]
    )
);

OK, so here we've got ourselves a new servicehost variable, which we'll use to add a new service endpoint, with our newly created RemoteService service behavior as the type. Then there's the endpoint behavior. We create a new TransportClientEndpointBehavior, with a shared access signature as the token provider.
NB! In the SDK and the MSDN article this is specified as "Shared Secret Token Provider", but that's ACS and is no longer supported in Azure. You have to use Shared Access Signature (SAS) for authentication or it won't work.

sh
    .AddServiceEndpoint(
        typeof(IServiceEndpointPlugin), 
        new WS2007HttpRelayBinding(), 
        AppSettings["SBusEndpoint"]
    ).Behaviors.Add(tcEndpointBehavior);

Here we add a service endpoint to the host. The type is IServiceEndpointPlugin, which is what the CRM async service sends to the Service Bus. We use WS2007HttpRelayBinding to match the source system, and we collect the endpoint from the app.config (formatted like the following: https://yournamespace.servicebus.windows.net/yourpath/ ).
What's important to note here is that the path specified should not be the same as an existing path. If you have a queue or topic with the same path specified, it will be overridden and you cannot recreate it in the Azure Portal afterwards. This also means that it's up to you which path you want to use for the relay, which also means you can modify it dynamically using the web.config or in advanced integration scnearios.
Finally we add the endpoint behavior we created ealier.

sh.Open();
Console.WriteLine("OneWay-listener, press ENTER to close");
Console.ReadLine();
Close();

Finally, we open up the service host connection, which makes it start listening to new messages. This means we're ready to set up the service in the plugin manager and start sending messages.

Switching to relaying in MSCRM

First off we need to create a new shared access policy in Azure. It's the same as we did in part1, except that this time we create it on the bus itself instead of on a queue.
Then we head over to the plugin registration tool, connect to our organization and add a new service endpoint. This time it'll look kind of like this when it's filled in:
What's important to note here is the namespace address and path. The namespace address should be the complete path, and the path should just be a forward slash (the tool does not accept blank values). If you specify the path in the path box then it won't be able to find and connect to your relay service (that took me a while to figure out). In addition, this is an https endpoint, not an sb endpoint
Next up we go into CRM to edit our workflow (for more info see part2 of this blog series). The only thing we need to do here is deactivate and update the service endpoint. Then save and activate it again. I've kept the workflow running synchronously, just to be able to verify that it works as expected.
Now, just to demonstrate how it looks if you've specified the wrong endpoint, or if the relay isn't running, here's the error message you get. It is the same error you'll get if you specify the path in the path box instead of in the namespace box.

Now, for the fun part instead. Start your relay service and wait for the host to be ready. Then go into CRM and trigger the plugin. If you've done everything right then you'll see a command window looking something like this

And that means we've successfully posted a message from our MSCRM system, through our azure service bus and out of the relay service. This example isn't very exciting, but just think of the possibilities you get if you put this service out into Azure (or on a web server if you're still into that whole old school infrastructure stuff ;) ).

That's it for this blog post. In the next and (for now) final post in this series we'll look at how we can extend this into a two-way relay, as well as integrating with Azure Event Hub which is a service based on the ASB.

Sunday, October 23, 2016

Microsoft CRM + Azure Service Bus, part 1 (creating queues and adding service endpoints)

Integrating Microsoft Dynamics CRM with Microsoft Azure Service Bus, using queues, topics, relays and the Event Hub

Todays post is kind of a wrap up from the previous Oslo Dynamics 365 meetup which was held on October 17th. We'll look into the native support for Azure Service Bus (ASB) in MSCRM  and how we can use service endpoints inside our plugins and workflows. This post will focus on creating a bus, queue and access keys in Azure, and how to register the endpoint in MSCRM using the plugin registration tool.
Click here for part2

What is Azure Service Bus (ASB)

ASB is a service bus used for sending messages between different endpoints, which allows you to build and manage interconnected applications and systems without having to worry about the communication channel (within reasonable limits).
ASB supports several different destination types and communication protocols, and in this blog series I'll focus on the ones supported by Dynamics CRM.

Creating a queue and access key

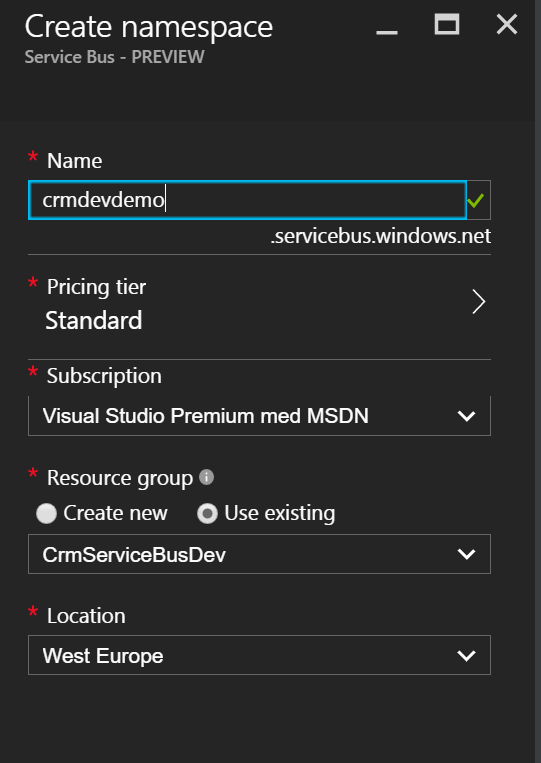
The first step to adding an ASB endpoint in MSCRM is to create it and generate access policies. We'll start by logging into the Azure Portal and adding a new resource. Simply search for Service Bus and you'll find the following available

Fill in the required information to create the new resource, and hit the create button to start provisioning your brand new queue.
TIP: If you're using CRM Online, optimize performance in MSCRM by creating the bus in the same location as your tenant. This will minimize latency and will be very helpful in scenarios where you use Event hub for advanced auditing or similar high-ouput situations.

Now that we have a brand new service bus, it's time to add a queue to it. Navigate to Queues in the left hand navigation box and click on the [+ Queue] button. Give it a name and hit "Create" to get started.
Please note that the size option is the storage size of the queue, not the message size. In my tests the messages typically were between 13 and 60kB, so a 1GB queue would hold between 16k and 77k. Even if that seems much (after all, messages are deleted after processing), remember to plan for system downtime and SLA response times. if you generate a total of 20k messsages per day then you could be looking at data loss before gets a chance to take a look at it. I highly recommend you read up on queues and how to build a robust system using ASB aside from this blog post. I'm just presenting you with a simple way to get it working, not a complete integration strategy.
Now, open up your queue and navigate to Shared Access Policies. By default there won't be any policies in a new queue (there is one for the parent bus, I'll come back to that in the post about relaying), so click Add to create a new Shared Access Policy. Now you'll be asked to specify the claims added for this policy, which are "send", "listen" and "manage". Manage automatically gives the other two, but you could add a "send" access policy without "listen", and the other way around. The claims are pretty self-explanatory. Listening allows an application to read and complete messages, sending allows an application to send messages to the queue, and manage allows an application to make changes to the queue itself. I recommend a least-access-policy, ie. create seperate keys for systems that will listen and send messages, and don't overuse the keys across multiple systems. For demo purposes, using a full access key or a send&listen key is good enough.
Now you have a service bus, a queue, and an access key. You're ready to integrate MSCRM with Azure Service Bus.

Adding a service endpoint to MSCRM

To add a new service endpoint to MSCRM we have to use the plugin registration tool. You'll find it inside the MSCRM SDK under tools. Run the PluginRegistration.exe file and connect to your MSCRM organization. Once connected you'll have a new tab for your organization with a set of actions you can perform. Click on the register button, and then on the "register new service endpoint" option. You'll be presented with two options, either entering a connection string or starting with a blank connection window. I recommend pasting in the connection string from the azure portal, giving you a completely filled out connection settings window.

Message format

You have three different formats to choose from; .NETBinary, JSON and XML. This is simply the data representation of the message content. If you're planning to integrate with websites or other non-.NET technologies, or if you don't want to be dependent on the CRM SDK in your processor applications then you can simply choose one of the other message formats. Just keep in mind that XML can be quite bloated when it comes to size, so if you expect to send messages near the size limit then I would go for JSON (or even better, .NETBinary)

Take note that you can also choose to send the UserId as a parameter as well. This allows for additional authorization checks in your processing steps, and can be very useful to help determine who did what.
Now hit save, and you're done! A new service endpoint registered and you're ready to go.

In the next post in this series I'll demonstrate how to write a custom workflow step to use the service endpoints.


I also recommend to read up on the technologies. I'm just giving you a simple demo on how to actually do this, but there's a lot more to know and understand in order to plan and implement this successfully in your environment.

MSDN article on integrating Azure with CRM (NB: the samples for relay listeners are outdated as of 2016-10-23)